
Thursday, 4 January 2018
Combining 3D surface scan with MRI brain scan in ParaView
As I had both a brain MRI scan and a 3D surface scan (kind gift from ImFusion at their MICCAI booth), I thought about aligning them both (rigid registration with manually selected landmarks) and visualising the result in ParaView:
Tuesday, 22 November 2016
XTK and mutant mice embryos
I recently came across this tweet from the Medical Research Council:
This tool is awesome.
Not only do they have 2D and 3D viewers embedded in the web browser for micro-CT volumes of healthy and mutant mice embryos, but they also provide 48 datasets available for viewing AND for download, either at low or high resolution.

Screenshot of 3D viewer.
I recognise XTK when I see it (then I check the HTML source just to be sure): medical imaging is a small world, and it happens that this project has been developed by the Boston Children's Hospital, which has one of the few groups working with high-resolution imaging of the fetal brain through MRI, a topic at the heart of my PhD. The XTK website has quite a few demos, but this is the first time I see a real life application. An MSc project at Imperial College, carried out by David Basalla two years ago, consisted in building an image viewer with XTK, but it stayed yet another demo.
There are quite a few projects out there that leverage WebGL, Javascript and the HTML5 Canvas to embed 3D viewers in the browser. Those with a focus on medical imaging, like XTK and Papaya, have the advantage of providing readers for DICOM and NIfTI formats. three.js is a well-known more generic WebGL framework.
Kitware, the company behind ITK and VTK, is coming to the browser too, with ParaviewWeb and vtk.js. Mayavi, a Python library built on top of VTK, uses x3d to embed 3D visualisations in the Jupyter notebook, as I showed in my previous blog post.
The old school solution of Java applets, for instance based on ImageJ, is an alternative to Javascript in order to have an embedded image viewer. For instance it is used in MRIdb, the web interface to the MRI research database of Guy's and St Thomas' Hospital.
New software lets you compare healthy and mutant embryos side by side to phenotype faster. @MRCHarwell @IMPC https://t.co/FNWoKILUaJ pic.twitter.com/yWVzzeEWSG— The MRC (@The_MRC) November 4, 2016

I recognise XTK when I see it (then I check the HTML source just to be sure): medical imaging is a small world, and it happens that this project has been developed by the Boston Children's Hospital, which has one of the few groups working with high-resolution imaging of the fetal brain through MRI, a topic at the heart of my PhD. The XTK website has quite a few demos, but this is the first time I see a real life application. An MSc project at Imperial College, carried out by David Basalla two years ago, consisted in building an image viewer with XTK, but it stayed yet another demo.
There are quite a few projects out there that leverage WebGL, Javascript and the HTML5 Canvas to embed 3D viewers in the browser. Those with a focus on medical imaging, like XTK and Papaya, have the advantage of providing readers for DICOM and NIfTI formats. three.js is a well-known more generic WebGL framework.
Kitware, the company behind ITK and VTK, is coming to the browser too, with ParaviewWeb and vtk.js. Mayavi, a Python library built on top of VTK, uses x3d to embed 3D visualisations in the Jupyter notebook, as I showed in my previous blog post.
The old school solution of Java applets, for instance based on ImageJ, is an alternative to Javascript in order to have an embedded image viewer. For instance it is used in MRIdb, the web interface to the MRI research database of Guy's and St Thomas' Hospital.
Friday, 4 November 2016
London 28th PyData Meetup (01/11/2016)
I gave a talk at the last PyData meetup in London on Python for medical imaging.
It was a great opportunity to showcase some of the projects I have been working on at Klarismo since I joined the company a year ago.


This animation is a progressive warping of two MRI scans of a subject who lost weight between the scans.
Atlas segmentation
Some of our segmentations are performed using an atlas segmentation framework. This approach relies on a set of already annotated scans, called atlases. In order to segment a new scan, we align and warp the annotated scans to the new scan and then transfer the warped annotations. By combining the warped annotations from multiple scans, we can obtain a reliable estimate for how the new scan should be annotated.Visualising changes across scans
I worked on aligning whole body scans acquired at different time points in order to highlight change. The thing to keep in mind is that if someone is scanned twice, his posture and breathing pattern will differ between the two scans. These differences need to be corrected in order to only visualise changes in the anatomy.This animation is a progressive warping of two MRI scans of a subject who lost weight between the scans.
Wednesday, 24 June 2015
Highlights from PyData London 2015
PyData London 2015 took place last weekend, hosted at the shiny Bloomberg offices in London. It was a great experience, full of knowledge sharing and friendly discussions: all the photos taken by Florian Rathgeber are here to testify, and soon videos of the talks should follow. Thanks a lot to the NumFOCUS Foundation, whose motto is "Open code, Better science", for making this event possible.
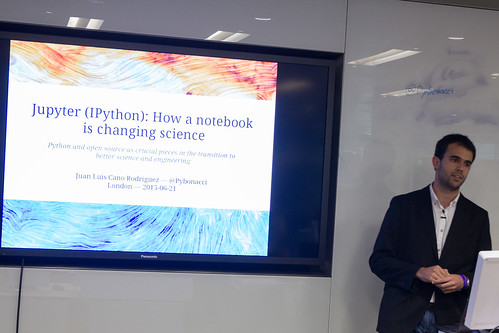
Among the memorable talks was the one from Juan Luis Cano Rodríguez on Jupyter (see abstract) and the role of IPython notebooks for reproducible science. With all his energy and love of Python, this little guy will fly far. The key idea behind the notebooks is to display and run your code in the browser, embedding the output in the page, be it simple numbers or complex graphics. When the Python (or R/Julia/...) kernel is shut down, the page becomes frozen and ready to be shared. Others can quickly browse it or re-run the code as they wish. Just provide a link to download the input data and you have the perfect mix for reproducible experiments. See here for a live demo in the Nature journal.
The second talk which just made my day is Romain Guillebert's presentation on Pypy (see abstract), an alternative implementation to CPython, and pymetabiosis, a bridge between CPython and Pypy. He ran a Sobel edge detection coded in pure Python on images stored as python lists: roughly speaking, CPython was running at 2 seconds per frame and Pypy at 25 frame per seconds. To remove any doubt, he did it both with a recorded video and a live feed from his webcam. If all it takes is
Among the memorable talks was the one from Juan Luis Cano Rodríguez on Jupyter (see abstract) and the role of IPython notebooks for reproducible science. With all his energy and love of Python, this little guy will fly far. The key idea behind the notebooks is to display and run your code in the browser, embedding the output in the page, be it simple numbers or complex graphics. When the Python (or R/Julia/...) kernel is shut down, the page becomes frozen and ready to be shared. Others can quickly browse it or re-run the code as they wish. Just provide a link to download the input data and you have the perfect mix for reproducible experiments. See here for a live demo in the Nature journal.
Juan starting his talk on Jupyter.
The second talk which just made my day is Romain Guillebert's presentation on Pypy (see abstract), an alternative implementation to CPython, and pymetabiosis, a bridge between CPython and Pypy. He ran a Sobel edge detection coded in pure Python on images stored as python lists: roughly speaking, CPython was running at 2 seconds per frame and Pypy at 25 frame per seconds. To remove any doubt, he did it both with a recorded video and a live feed from his webcam. If all it takes is
s/python/pypy/, then I take it: it is much less code adaptation than all the alternatives proposed in the high performance talks (e.g. numpy, numexpr, numba and cython). Guido Van Rossum mentioned it when he came to Imperial: if Python is slow, use Pypy. Romain did a perfect demonstration of it. Of course, Pypy is not ready yet. But shall we switch to a new and faster language where image processing packages might be non-existent or in their infancy, such as Julia, or shall we instead spend our efforts making Python faster? Furthermore, there are companies interested in a faster Python implementation, such as Lyst (where Romain works) who are giving a try at Pypy, or Dropbox (where Guido works), who are working on Pyston, their own implementation of Python. There is the cost of porting existing code, and is it worth losing the simplicity of the Python syntax? Be it Julia, Pypy or others, the global switch will happen when a certain critical mass is reached, both in term of user community and maturity of key packages. It is a good time to choose a side.Saturday, 20 December 2014
Medical Image Analysis IPython Tutorials
As the Christmas break approaches and the Autumn term will soon be over, I am glad that I've been given the opportunity to feature on this blog the teaching material for the course Medical Image Computing that was newly introduced this year at Imperial College. This course, taught by Prof. Daniel Rueckert and Dr. Ben Glocker, aims to provide MSc students with the necessary skills to carry out research in medical image computing: visualisation, image processing, registration, segmentation and machine learning. The lectures were accompanied by tutorials in the form of IPython notebooks developped by Ozan Oktay, using SimpleITK to process medical images in Python and scikit-learn for Machine Learning. These tutorials are made available on github. They provide an introduction to medical imaging in Python that complements SimpleITK's official notebooks.
There are 4 tutorials:
Image registration is the process of aligning images (rigid registration) and warping them (non-rigid registration) in order to compare or combine images. A typical application is a patient being scanned twice at a few months interval and the two scans are registered in order to assess the evolution of a disease. Another application illustrated below (see tutorial 2) is a patient having an MRI and a CT scan, each modality highlighting different characteristics of a patient's anatomy, and a registration process is required before the doctors can overlay both images.
There are 4 tutorials:
- Basic manipulation of medical image, image filtering, contrast enhancement, and visualisation
- Image registration, multi-modal registration, Procrustes analysis
- EM segmentation and gaussian mixtures models, atlas prior, Otsu thresholding
- Machine learning: classification, regression and PCA.
 |
 |
the CT scan (red) and the MRI scan (green) are registered in order to be combined in a single image. |
|
|---|---|
Wednesday, 12 November 2014
Viewing medical images in an IPython notebook
I was looking for a simple way to browse medical images within an IPython notebook, and came across the interact function which makes it really easy to work with sliders. The function irtk.imshow returns three orthogonal slices for a given (z,y,x) concatenated in a single image. PIL is used to avoid writing temporary images to disk.

The sliders disappear when the notebook is saved as HTML, here are some hints for preserving the interactivity through JavaScript (though this is probably not the best approach for an image viewer).
Ideally, a medical image viewer integrated within the IPython notebook would use XTK, but there is still works to be done before it provides a working solution, see github/fperez and github/richstoner for proofs of concept.
In [1]:
import irtk

patient_id = '2159'
img = irtk.imread( patient_id + "_img.nii.gz" )
seg = irtk.imread( patient_id + "_seg.nii.gz" )
In [2]:
from IPython.html.widgets import interact, interactive, fixed
from IPython.html import widgets
from IPython.display import display

def f(z,y,x):
    display( irtk.imshow(img,seg,index=(z,y,x)) )

interact( f,
         z=widgets.IntSliderWidget(min=0,max=img.shape[0]-1,step=1,value=img.shape[0]/2),
         y=widgets.IntSliderWidget(min=0,max=img.shape[1]-1,step=1,value=img.shape[1]/2),
         x=widgets.IntSliderWidget(min=0,max=img.shape[2]-1,step=1,value=img.shape[2]/2) )

The sliders disappear when the notebook is saved as HTML, here are some hints for preserving the interactivity through JavaScript (though this is probably not the best approach for an image viewer).
Ideally, a medical image viewer integrated within the IPython notebook would use XTK, but there is still works to be done before it provides a working solution, see github/fperez and github/richstoner for proofs of concept.
Tuesday, 21 October 2014
Creating a video from PDF slides with ffmpeg and ImageMagick
To illustrate the role of autocontext in [1], I created a video from the successive probability maps obtained in the segmentation of the left ventricle in 3D echocardiography. This post is a quick overview of the bash and LaTeX code I used for this video. The XKCD style for beamer is presented in a previous blog post.
The slides are first converted from PDF to PNG using ImageMagick, then each slide is transformed into a single movie in order to easily control the time spent on each frame (
The slides are first converted from PDF to PNG using ImageMagick, then each slide is transformed into a single movie in order to easily control the time spent on each frame (
-t option of ffmpeg), as well as the insertion of other movies.
Subscribe to:
Posts (Atom)